How to Install Visual Studio Code on Windows
Introduction
Welcome back to our blog! In this step-by-step guide, we will walk you through the process of installing Visual Studio Code (VS Code) on your Windows machine. VS Code is a powerful and versatile code editor that’s widely used by developer and Engineers for various programming and scripting tasks. Let’s get started!
Step 1: Access the VS Code Download Page
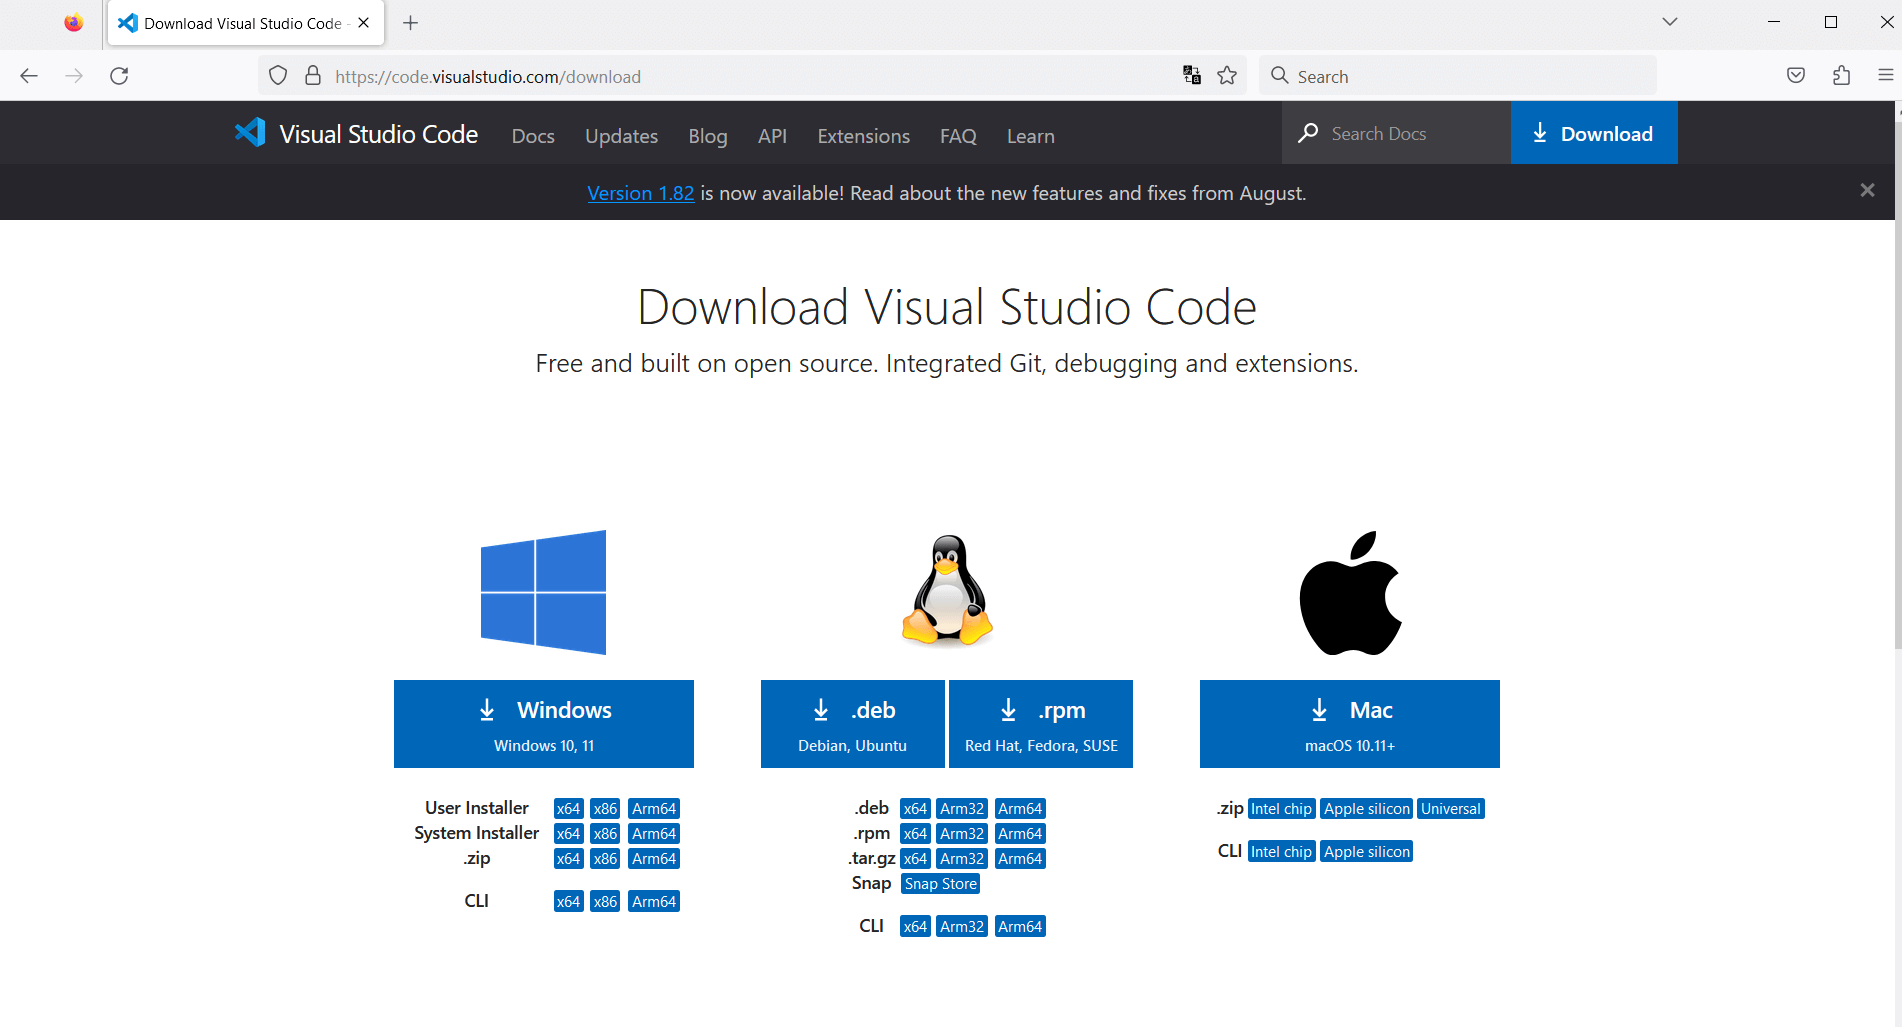
To initiate the installation process, open your preferred web browser and navigate to the official VS Code download page. You can do this by entering the following URL in your browser’s address bar: VS Code Download Page.
Step 2: Choose Your Operating System
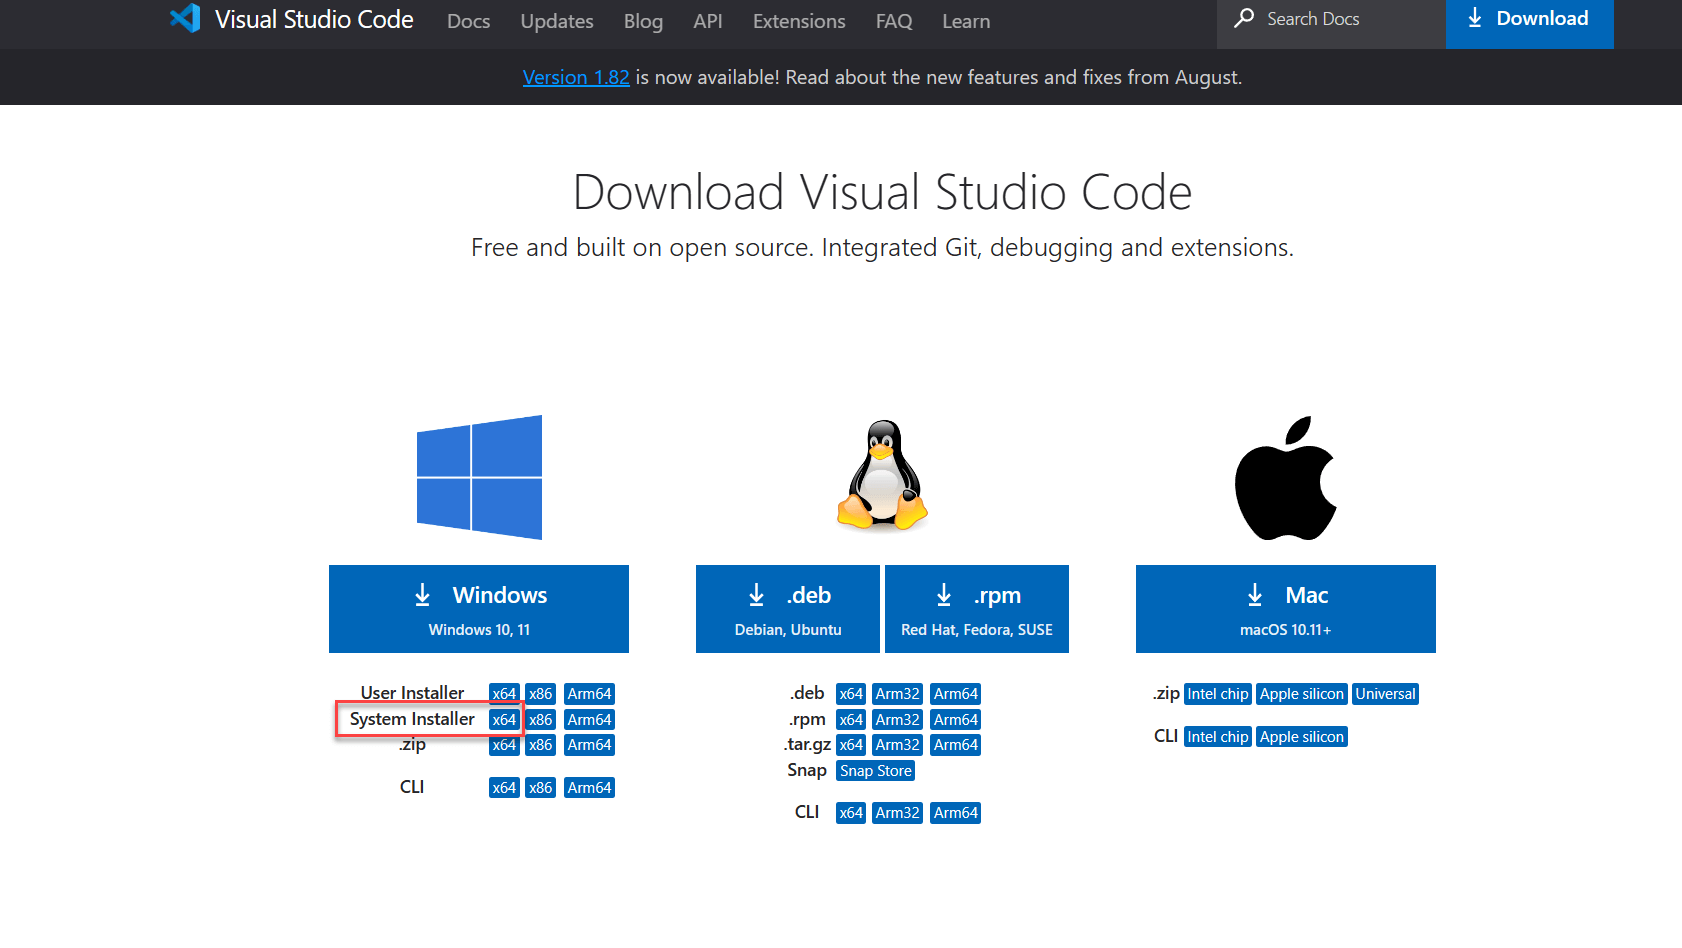
Once you’re on the download page, you’ll be presented with options for different operating systems. Since we are focusing on Windows 10, click on the Windows icon to select it. you’ll notice that VS Code is compatible with Windows 10, and 11. This will automatically download the executable (.exe) installer file for VS Code to your computer. If you want to install Visual Studio Code for all users on the PC, select the x64 System Installer.
Step 3: Run the Installer
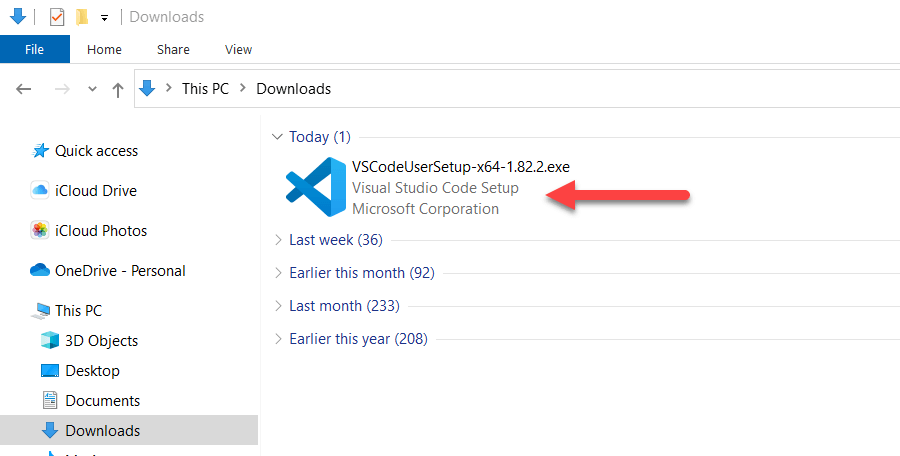
Locate the downloaded executable file, which is usually located in your computer’s default downloads folder. Double-click on the downloaded file to run the installer.
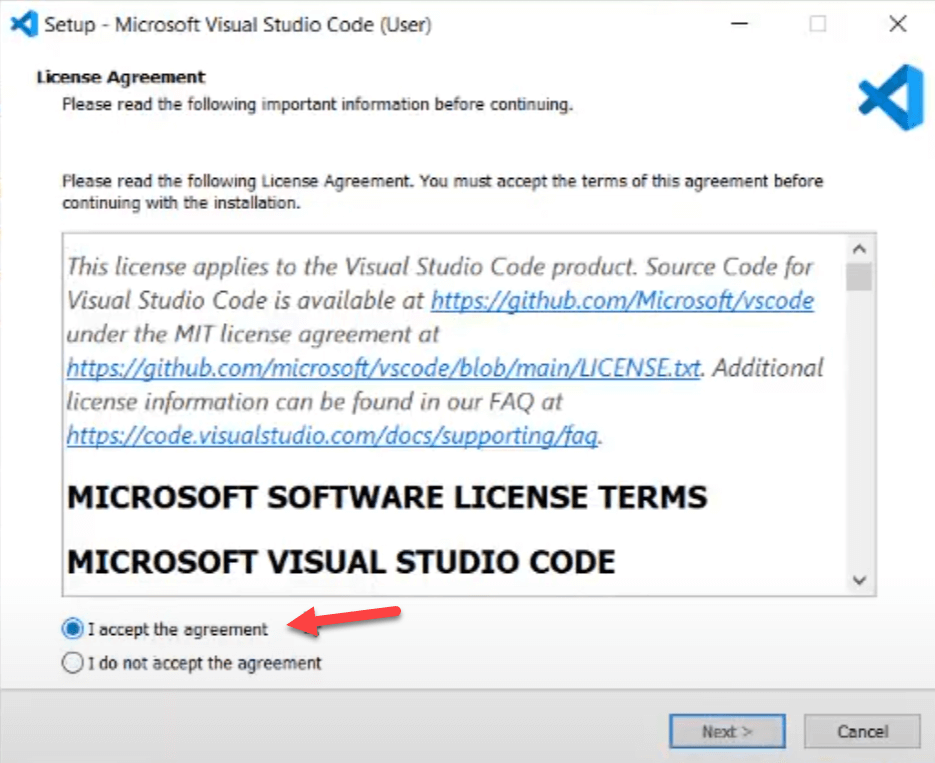
Step 4: Accept the Terms and Conditions
During the installation process, you’ll be presented with the terms and conditions for using Visual Studio Code. To proceed, click the “Next” button after carefully reviewing and accepting these terms.
Step 5: Choose Installation Location
You will now be asked to select the directory where you want to install Visual Studio Code. By default, the installer will suggest a path. If you’re comfortable with the default location, you can leave it as is. Click “Next” to continue.

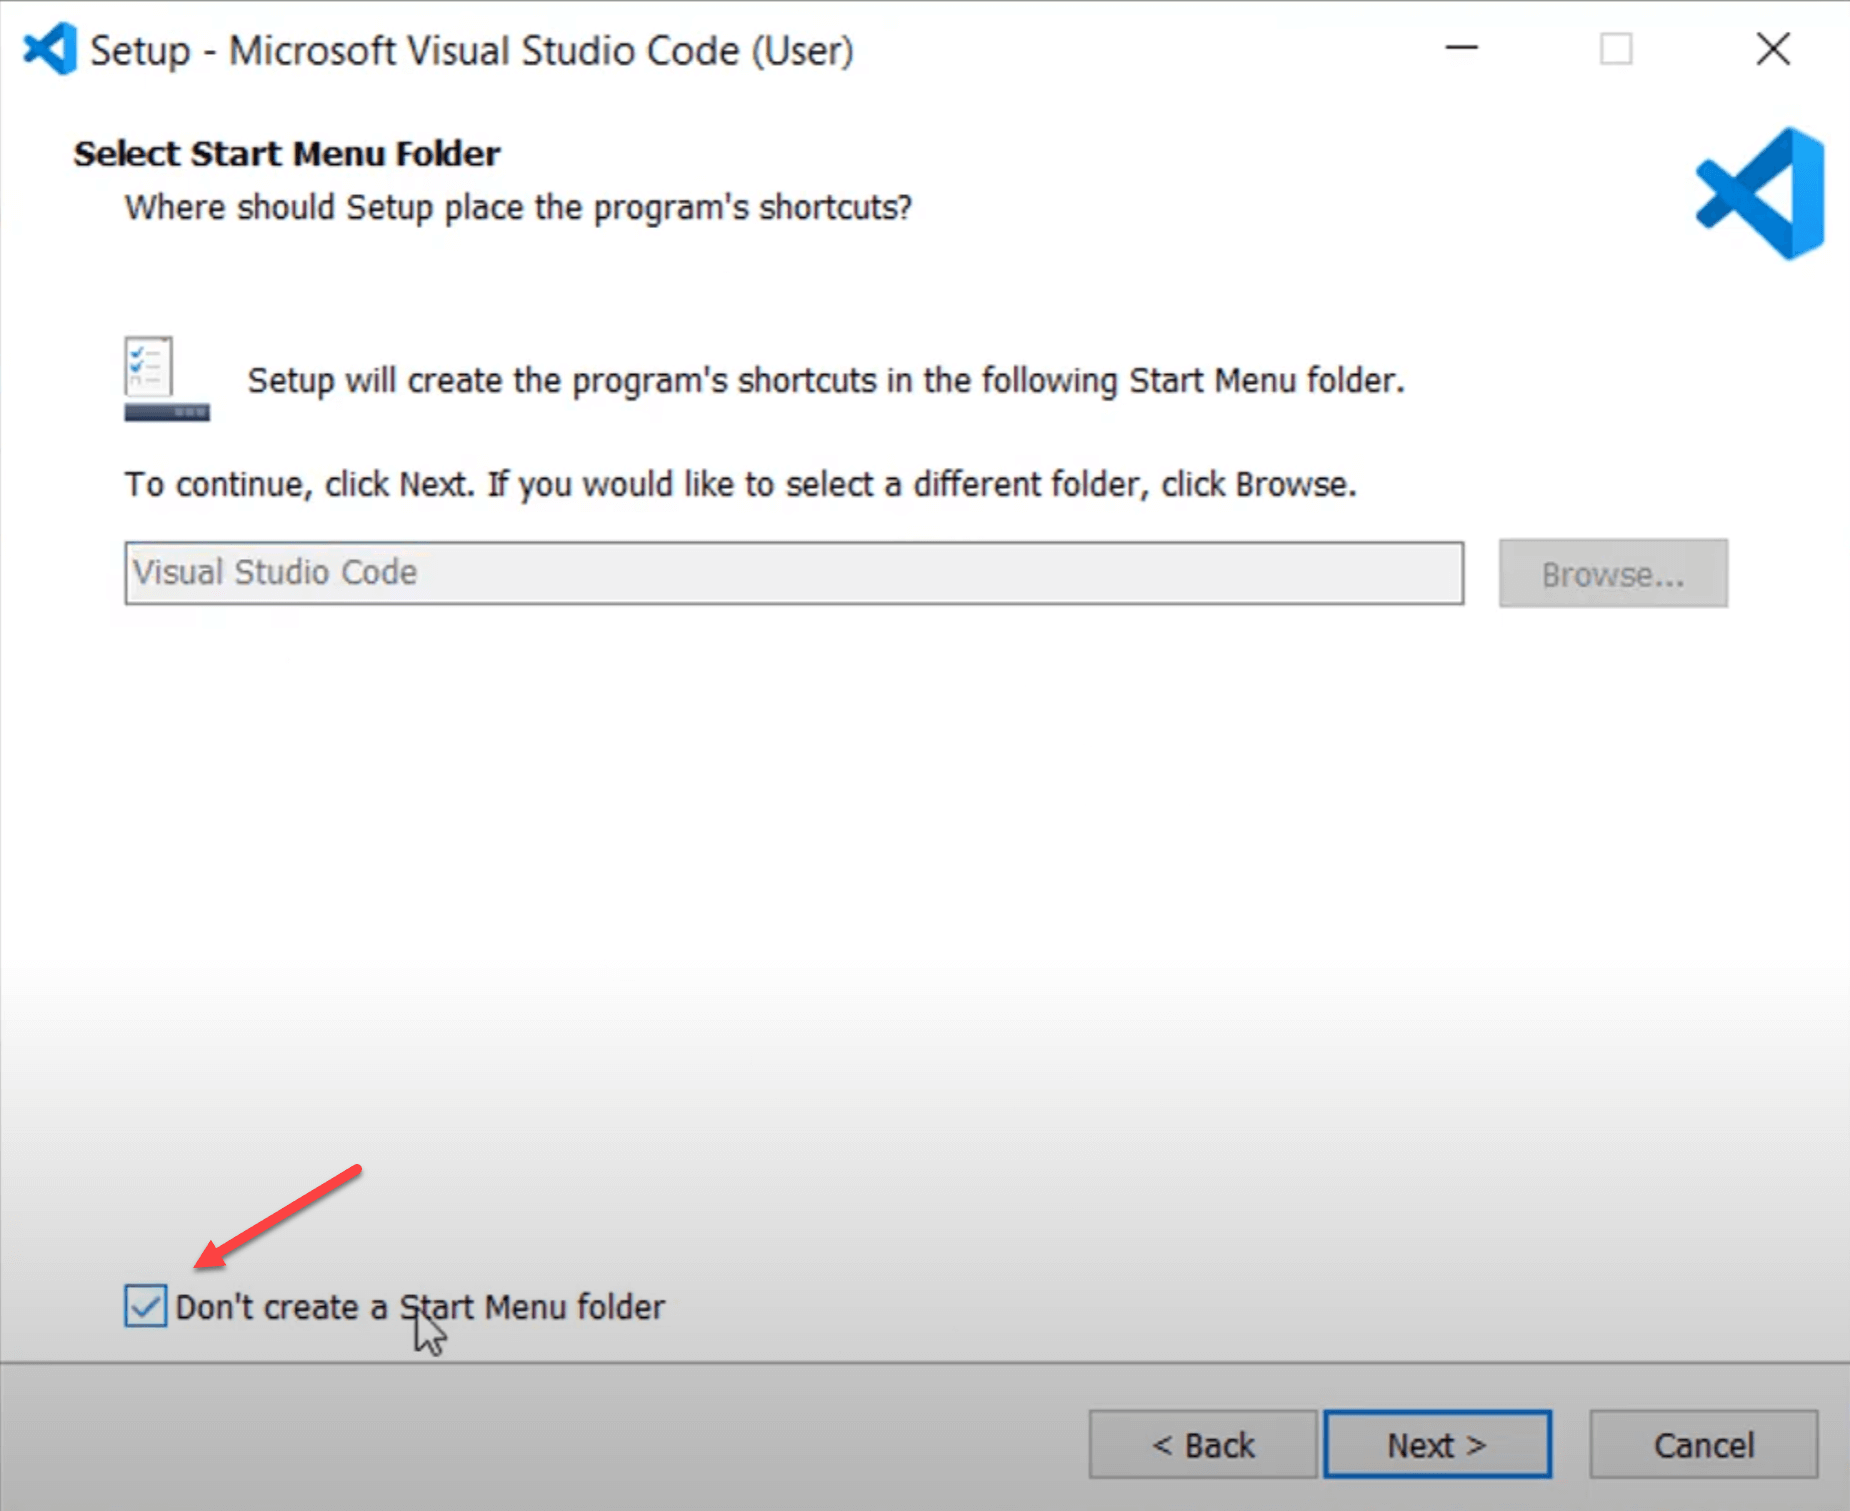
Step 6: Start Menu Shortcut (Optional)
The installer will also ask if you want to create a shortcut for Visual Studio Code in your Start Menu. If you want this shortcut, leave the option selected. If not, you can check the box. Then, click “Next.”
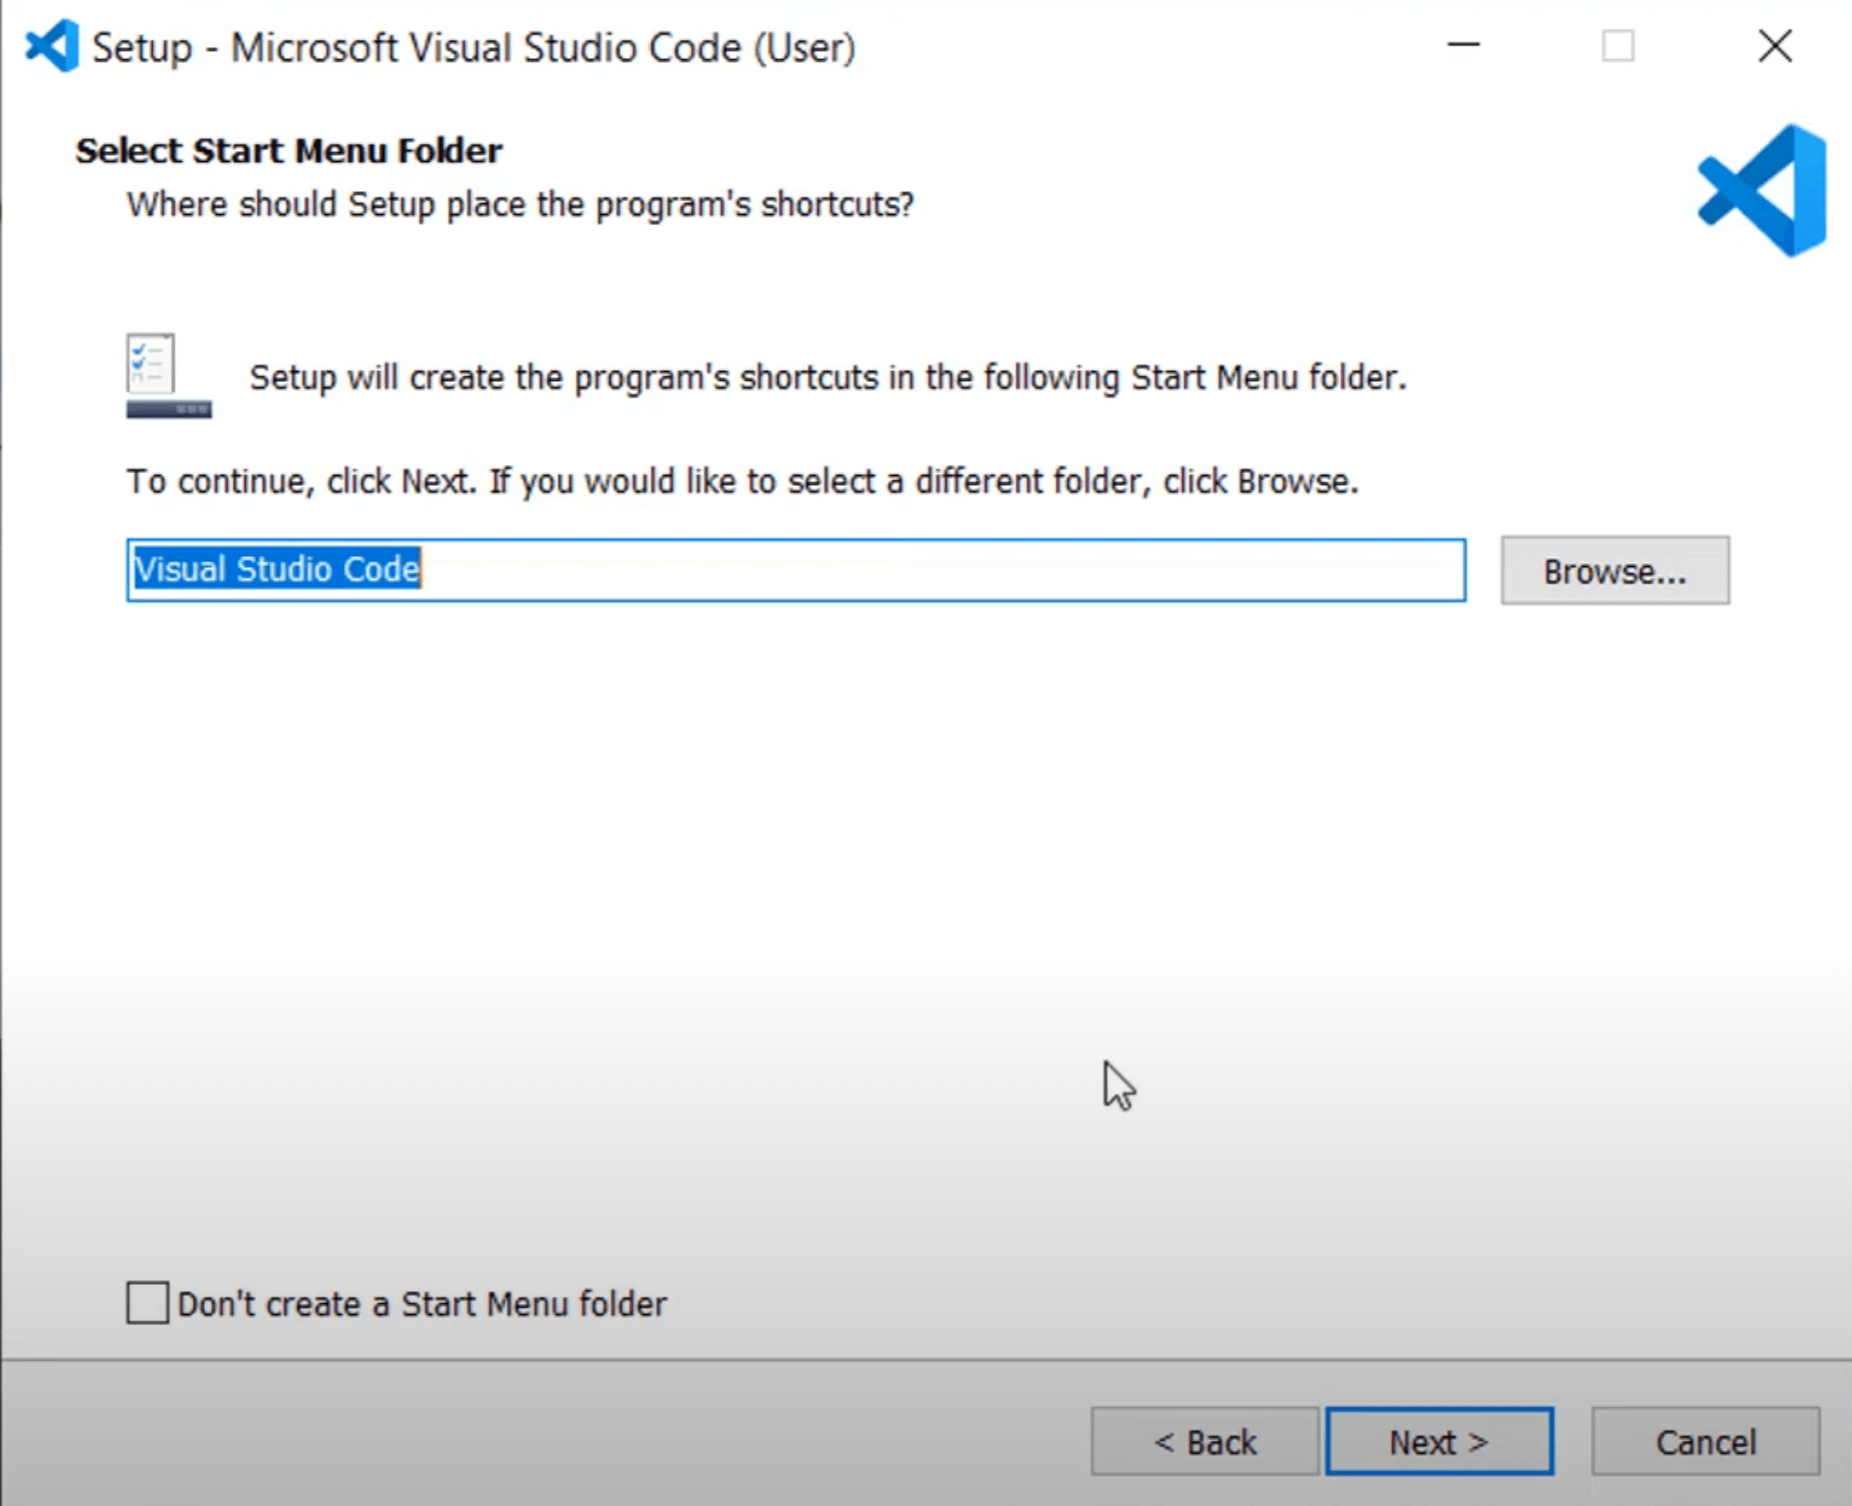
or if you don’t want it on the start menu, check the box
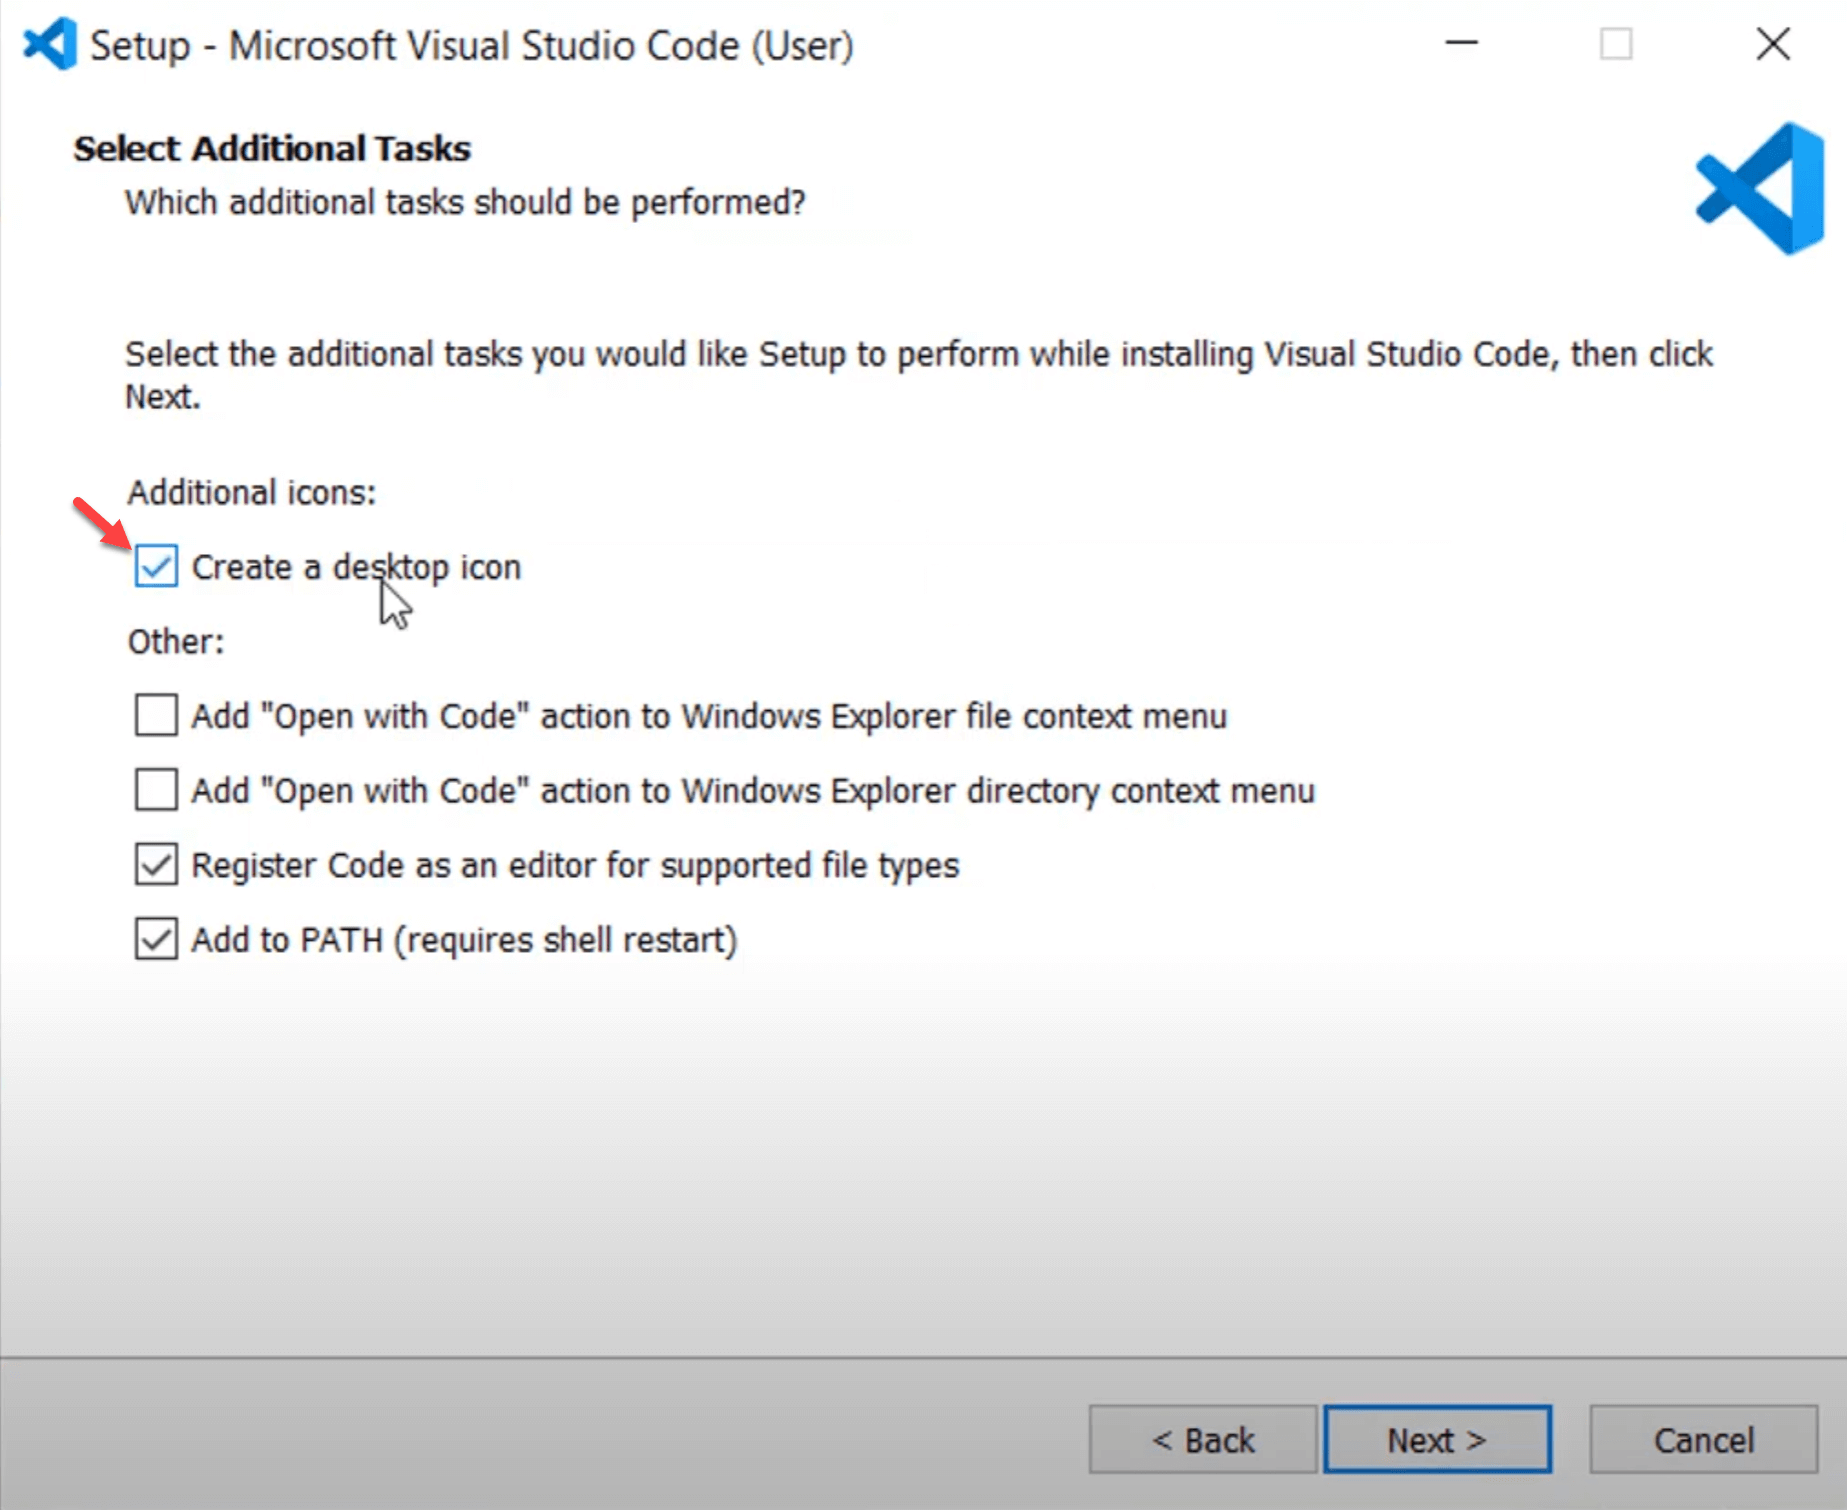
Step 7: Desktop Shortcut (Optional)
Here, you can choose to create a shortcut for Visual Studio Code on your desktop. Feel free to keep all other settings as their defaults. Click “Next” to proceed.
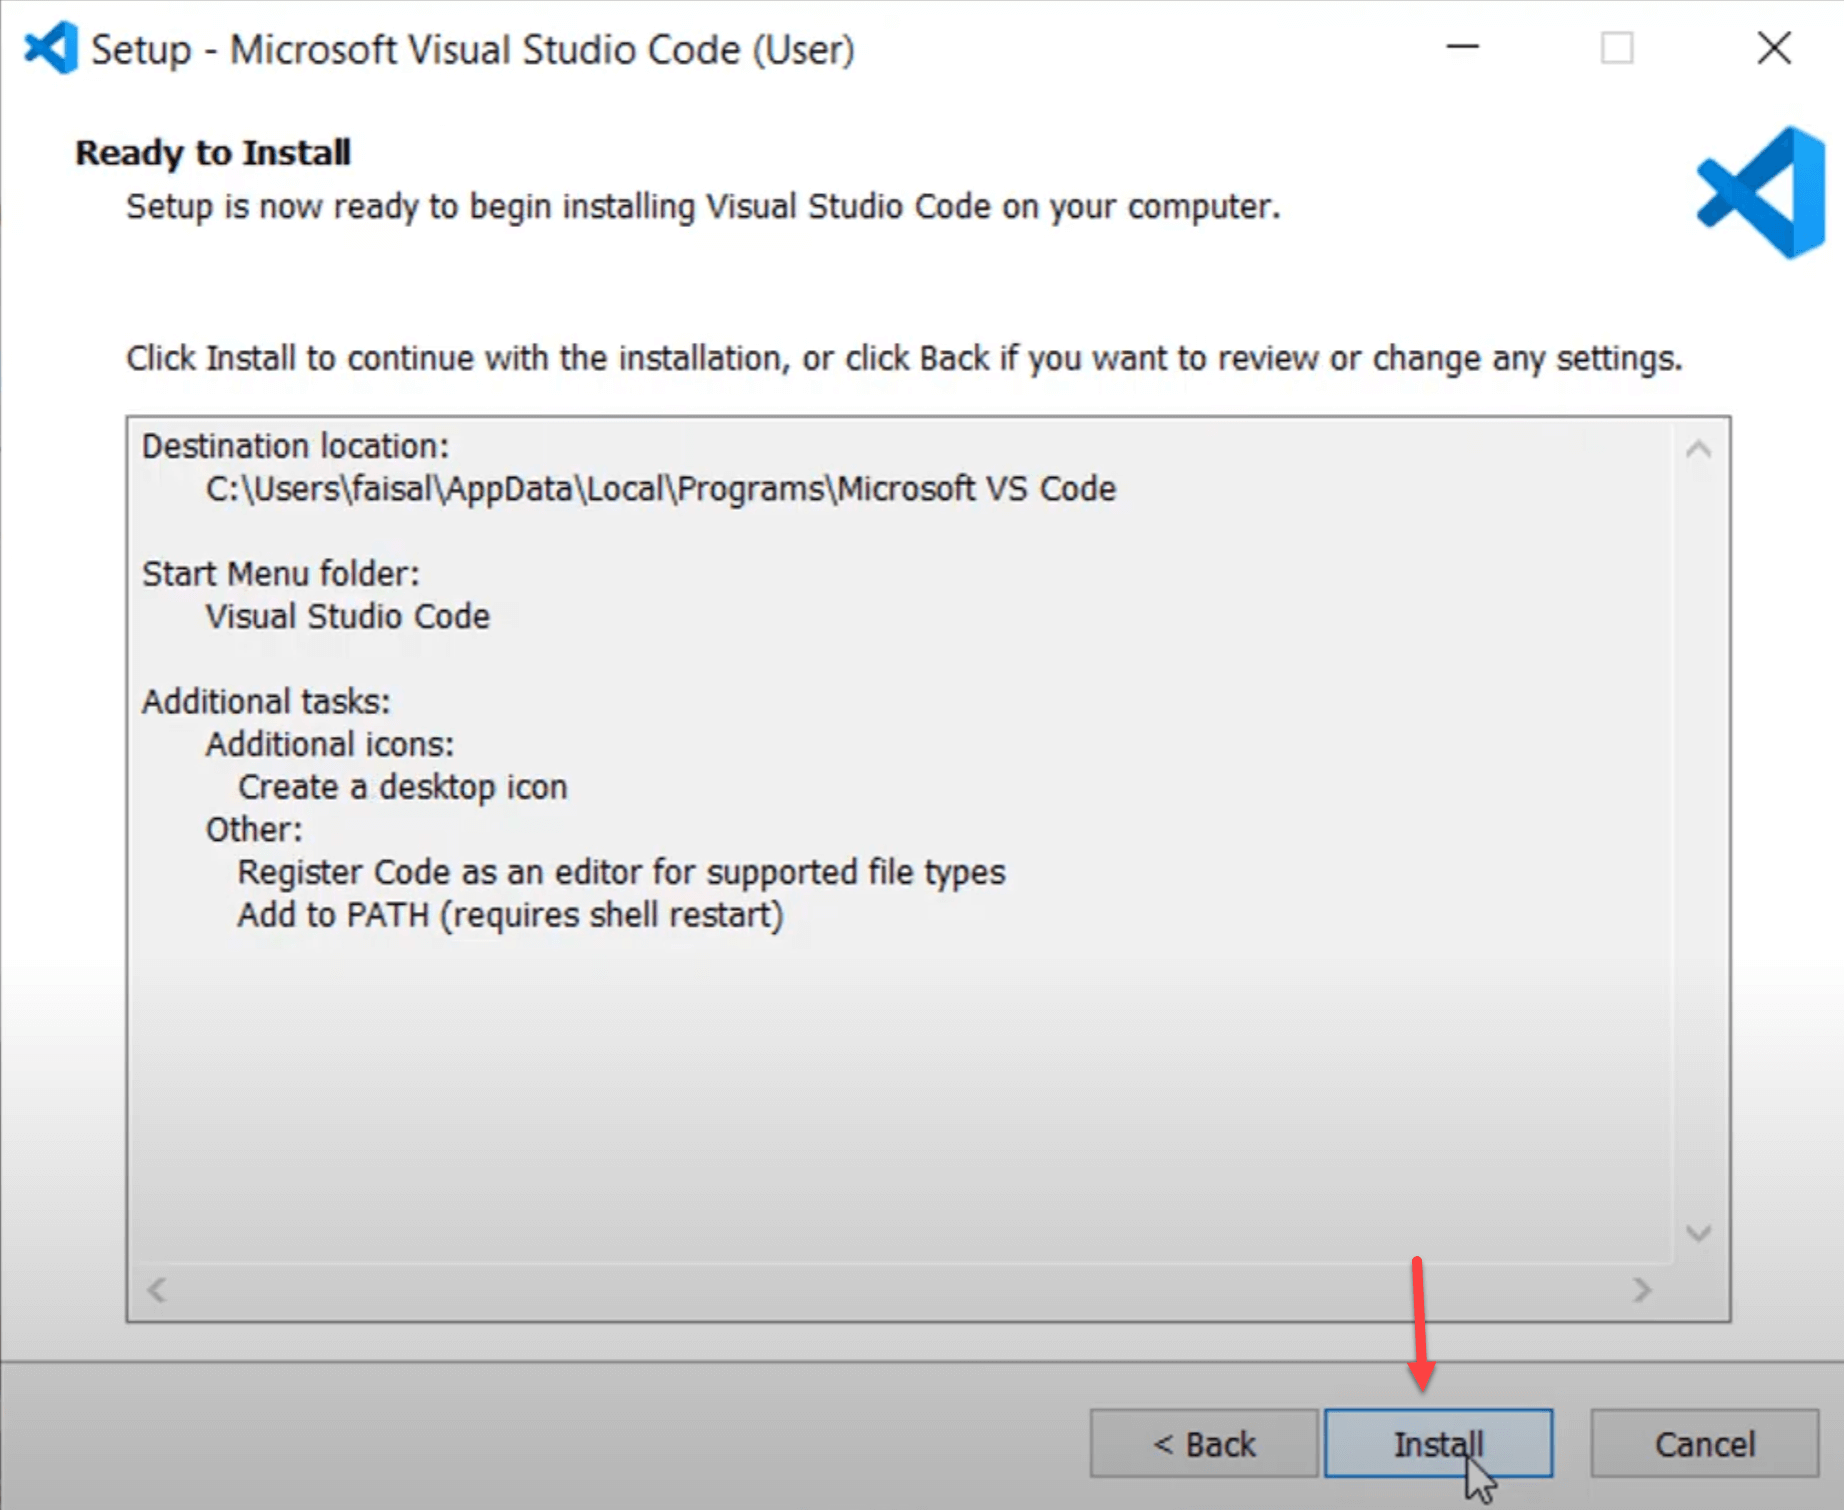
Step 8: Begin Installation
With your installation preferences configured, click the “Install” button to begin the installation process.
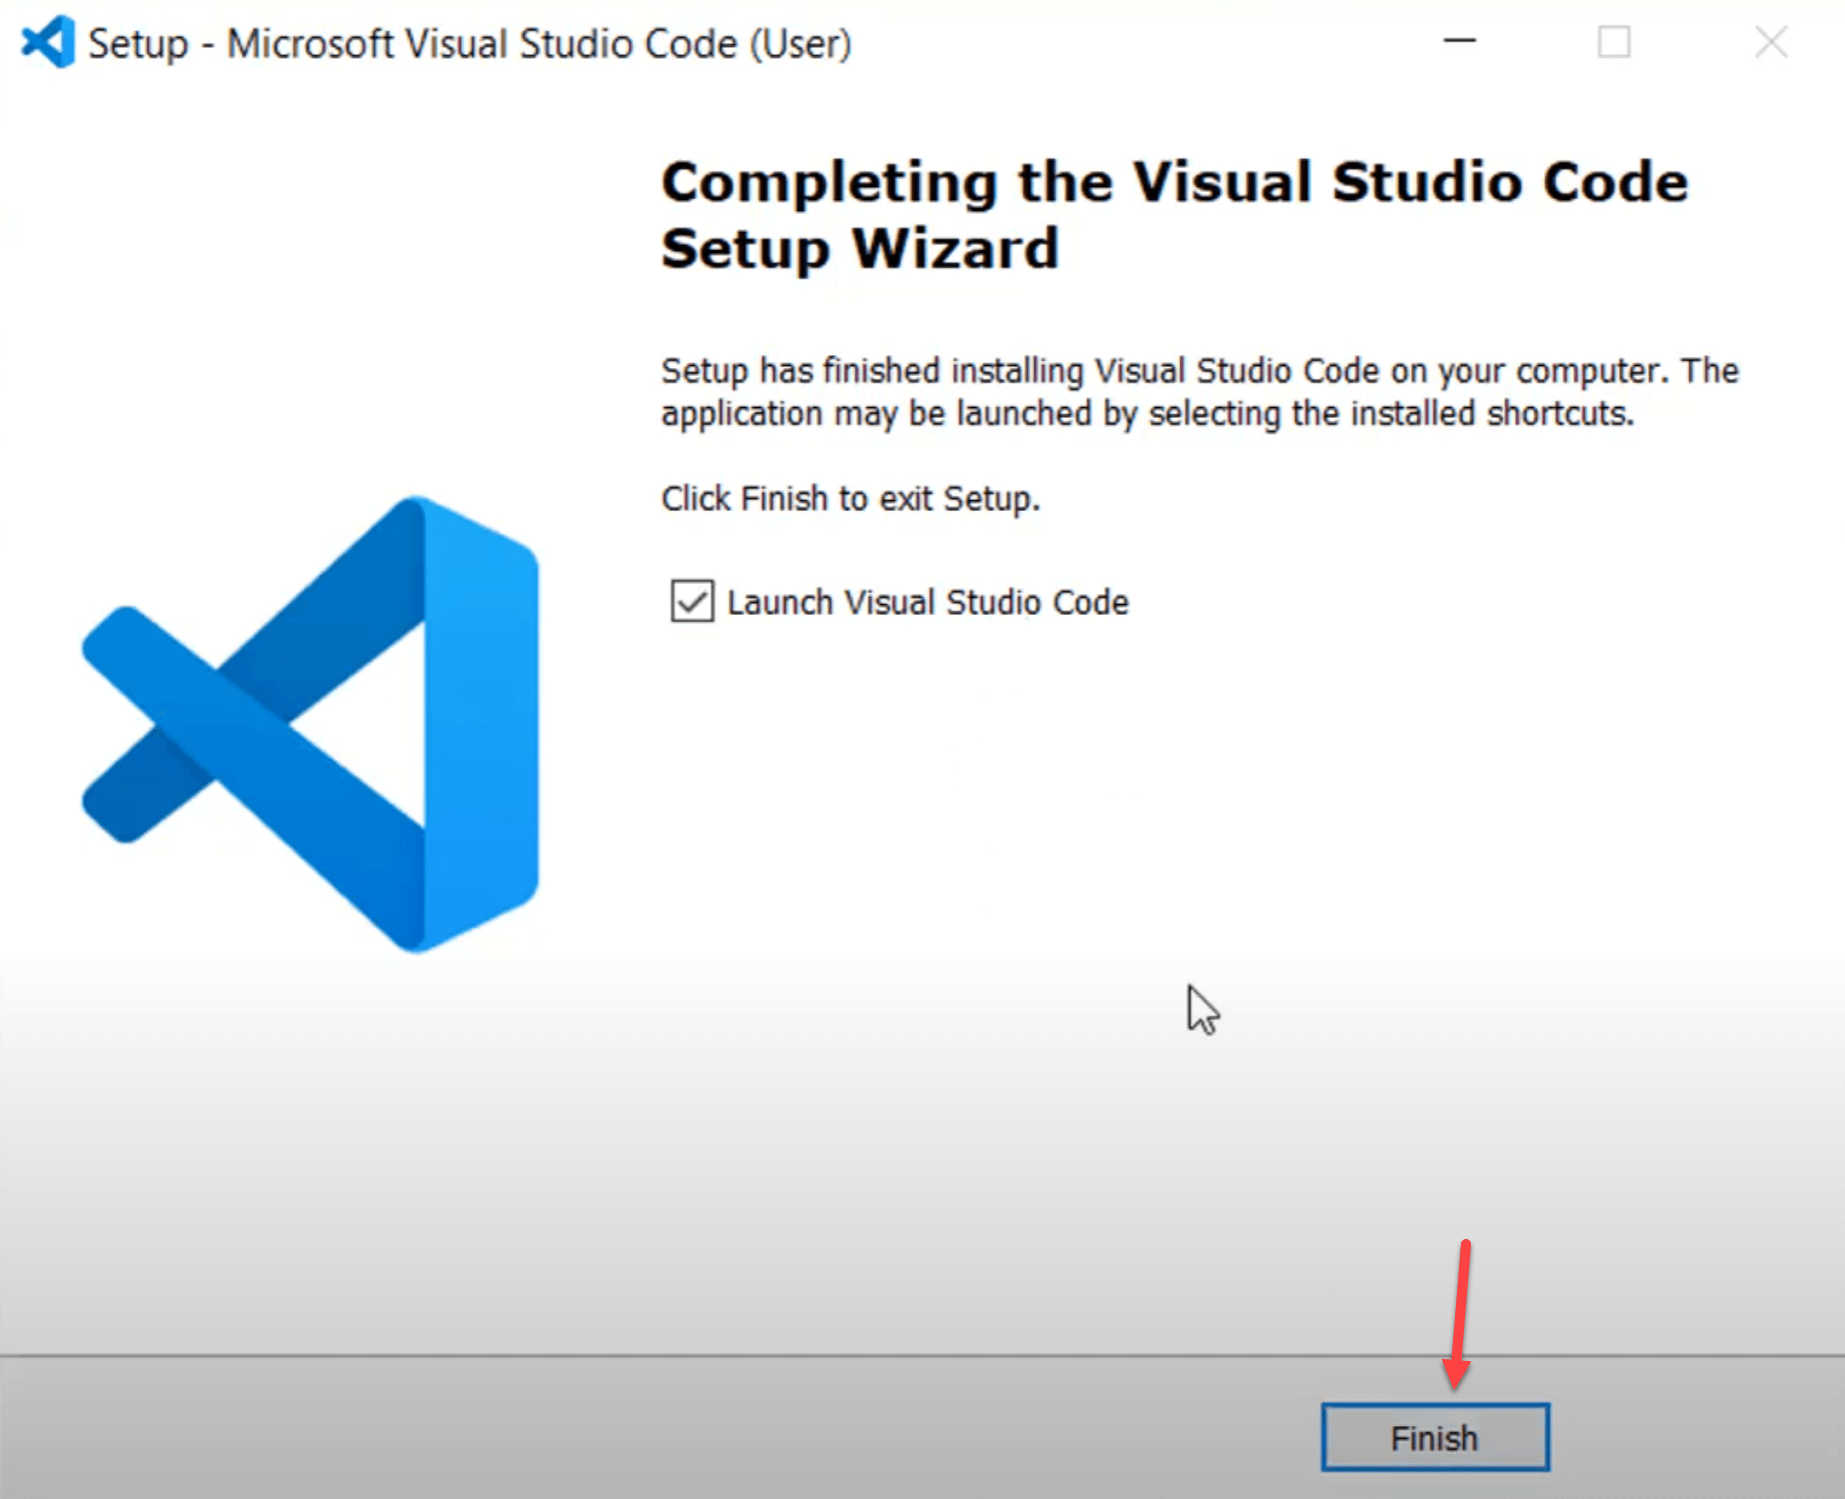
Step 9: Completion
Once the installation is complete, click “Finish.” This action will launch Visual Studio Code on your Windows 10 machine.